Three in the morning. Rain pouring down. You wake up to the sound of drops falling not outside but onto the carpet. In the dark you feel the windowsill, and there is already a puddle. Familiar to anyone who lives in an old house in Pasadena, Long Beach, North Hollywood, Glendale, Santa Monica, Burbank, or Torrance. Even in new homes it happens if builders cut corners on waterproofing.
This guide is for any type of housing: ground floor apartment, top floor apartment, single family home, townhouse, duplex. For any type of window: wood, vinyl, aluminum, sliding, casement, tilt turn, dormer. For any type of roof: flat, pitched, tile, membrane, standing seam. Water will find a way, and you will block it.
I will break everything down. What to do right now during a downpour. Which materials to keep at home. How to make permanent repairs. What complications can arise and how to solve them. Let’s go.
Part One. The Anatomy of a Leak: How Water Gets Inside
Before you fix, you need to understand where the water comes from. Water does not appear from nowhere. A window leak has five main entry points.
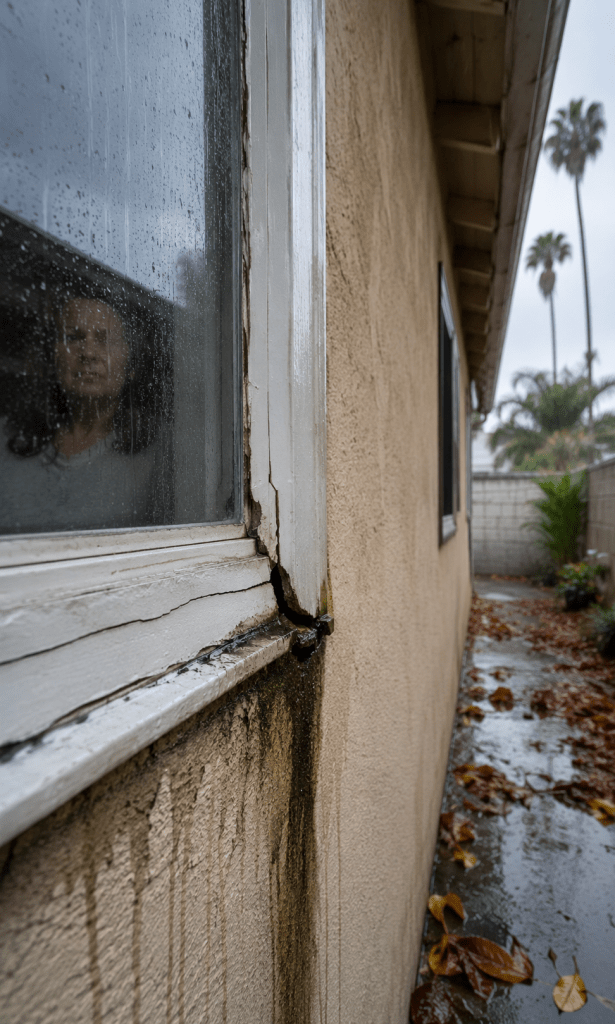
Entry one. Cracked sealant between the frame and the wall. Outside, the window is sealed around the perimeter with silicone or acrylic. After two or three years under sun and wind, this layer cracks and pulls away from the surface. A gap as thin as a razor blade appears. When rain falls at an angle, wind pushes water into that gap. You see a stain under the windowsill, but you do not see the gap outside because it is small, but it is enough.
Entry two. Clogged weep holes. Sliding windows and some casement windows have tiny slots at the bottom of the frame, about 3 by 10 millimeters. They allow water that enters the track to drain outside. When these holes get clogged with dirt, sand, spider webs, or dead insects, water builds up, rises in the track, and overflows inside the room. This is the most common cause, and it takes five minutes to fix.
Entry three. Damaged weatherstripping between the sash and the frame. Windows have moving parts. Between them is a rubber or brush seal. It ages, hardens, compresses, or falls out of the groove. During strong wind, rain pushes through this gap. You feel a draft even when the window is closed, and drops appear on the windowsill.
Entry four. Failed flashing above the window. In framed houses or houses with siding, a metal apron is installed above the window. It directs water running down the wall away from the window. If the flashing is missing, damaged, or installed incorrectly, water flows from above, gets behind the wall, and appears at the bottom around the window. You think the window is leaking, but the problem is higher up.
Entry five. Rotting frame or sill. Wood absorbs moisture, swells, then dries and cracks. Over time, holes appear right in the frame structure. Water flows through the wood like through a sponge. This is the most difficult case, requiring frame replacement.
Part Two. Emergency Tactics: What to Do in the First 15 Minutes During Rain
The storm is already here. You have no room for error. Every minute you wait, water soaks deeper into drywall, insulation, and wood studs. Here is the order of actions from most effective to least effective.
Action one. Stop the flow from outside if possible.
Do not go out on a ladder in the rain or lean out of a second story window. That is dangerous. But if the window is on the first floor of a house in Pasadena or Long Beach and you have ground access, take a sheet of heavy plastic. Not food wrap, but construction grade polyethylene at least 150 microns thick, sold at any hardware store. Cut a piece 20 centimeters wider and taller than the window on each side. Press it against the wall over the window. Secure it with blue painter’s tape or, even better, aluminum foil tape for exterior use. Tape the top first, then the sides, then the bottom. The tape must hold on a wet surface. This is not permanent, just for the peak hour of the storm.
If you do not have plastic sheeting and water is already pouring in, use a trash bag cut along the seams. Something is better than nothing.
Action two. Seal the gap from inside if you cannot reach the outside.
For apartments at height or houses without exterior access. Take a roll of plastic sheeting and painter’s tape. Cut a strip slightly longer than the window height. Tape over the gap between the interior frame and the wall jamb. Do not tape to the glass, tape to the plastic or wood of the frame and to the wall. This will not stop water completely if it is coming from outside, but it will reduce the amount. Water that has already passed behind the wall will still appear somewhere, but the pressure will drop.
Another emergency trick: take kitchen towels or rolls of toilet paper, twist them into ropes, and stuff them into the gap around the frame. They will absorb water like a wick and channel it down into a bucket rather than into the wall. Replace every half hour.
Action three. Clear the weep holes, even in the rain.
This is safe and fast. Go to the sliding window. Find the small slots at the bottom of the frame. Take a toothpick, a straightened paper clip, or thin wire about 5 to 7 centimeters long. Poke each hole. You will hear water draining outside. That is a good sign. If you have a can of compressed air for keyboards, use it. Blow the holes from inside and outside. Usually two or three passes are enough to restore drainage.
For casement windows that open outward or inward, there may be no weep holes. Instead, water drains through special channels at the bottom of the frame. Clean them with a damp cloth or a flat screwdriver.
Action four. Set up a temporary drip pan.
If water is flowing heavily, towels will not help. Take a plastic container, a shallow plant tray, or even a cutting board with raised edges. Place it on the windowsill tight against the frame. Wrap towels around it to catch splashes. A bucket on the floor below the sill. Create a path for water: from the frame into the container, from the container via a towel into the bucket. This is an old plumber’s trick, and it works every time.
Action five. Use emergency waterproof sealant for wet surfaces.
Hardware stores sell special repair putty for roofs and facades that hardens even underwater. Brands like RapidPatch, Water Plug, or hydraulic cement. It looks like gray play dough. Cut a piece, knead it in your hands, press it into the crack where water is visibly entering. It hardens in 5 to 10 minutes. It is not pretty, but it will stop water for 24 hours. Every owner of an old house in Los Angeles should have this material in their storage closet.
Action six. Wipe everything dry, even if it seems dry.
Take dry towels, microfiber cloths, they absorb best. Wipe the sill, the floor, the wall under the window. Press your finger into the carpet or laminate. If it feels damp underneath, lift the edge and put a dry cloth under it for a few hours. Moisture left overnight will grow black mold within 48 hours.
Part Three. Permanent Repair: How to Fix the Window Forever After the Rain Stops
The storm is gone, the sun is out. Now you have time to do everything right. Do not wait for the next rain, because the next one could come in a week.
Step one. Complete drying.
Open the window fully. If you have a fan, point it at the wall under the window. Turn on a dehumidifier if you have one and close the room. Measure the moisture in the wall with a moisture meter (costs about 30 dollars). It should read below 15 percent. Only work on a dry surface. Drying can take two to seven days depending on how much water the wall absorbed.
Step two. Remove all old sealant completely.
Go outside to the window. Take a sharp utility knife with replaceable blades, a putty knife, and a flat screwdriver. Cut away all old sealant around the perimeter between the frame and the wall. Leave no piece behind. If the sealant is still stuck but cracked, remove it anyway. Use a chisel or narrow putty knife to pry and peel it off. The surface must become clean: wall, frame, corners. Then sand the area with 120 grit sandpaper to remove residue and create a rough surface for adhesion.
Wipe everything with acetone or isopropyl alcohol. Dirt, dust, and grease will prevent new sealant from sticking.
Step three. Choose the right sealant.
At the store you will see dozens of tubes. You need pure 100 percent silicone for exterior use. Not acrylic, not latex, not siliconized acrylic, not polyurethane (unless you are a professional). Read the label: «100% silicone», «exterior use», «weatherproof», «UV resistant». Color: clear or matching your wall. Do not take black or white if your wall is beige. One tube costs 10 to 15 dollars. That is enough for two or three windows.
Also buy a caulking gun if you do not have one. Cartridges cannot be squeezed without a gun.
Step four. Apply correctly.
Load the tube into the gun. Cut the nozzle at a 45 degree angle to create an opening about 5 millimeters wide. Apply the sealant in a continuous bead directly into the gap between the frame and the wall. Not to the side, but inside the gap. Move from top to bottom, filling all voids. Do not be stingy. Then take a plastic spreader or just your finger dipped in soapy water and smooth the bead, pressing it deeper. You should have a smooth ridge about a centimeter wide. Wipe away excess with a damp cloth.
Let it dry according to the instructions. Silicone usually skins over in an hour, but full curing takes 24 hours. Do not wet the window during this time.
Step five. Inspect and clean weep holes permanently.
Take thin wire or a special window weep hole brush (sold online). Push through each hole until the wire comes out outside. Then pour half a glass of water into the window track. The water should drain out within a few seconds. If it sits, clean again. Now you know: these holes need cleaning once a year, before the rainy season.
Step six. Replace weatherstripping.
Inspect the rubber seal around the sash. If it is cracked, hard to the touch, flattened, or falling out of the groove, it needs replacement. Pull out the old seal. Take a piece with you to the store to match the profile. There are different shapes: D, P, E, felt brushes. Insert the new seal into the groove, starting from the top corner. Do not stretch it, just lay it in. Cut with a 1 centimeter overlap. Close the window. It should close with light effort, but not with difficulty.
Part Four. Complex Cases and Specific Window and Roof Types
Case for Long Beach: wood windows in a two story townhouse with a flat roof.
Long Beach has many homes from the 1960s to 1980s with flat roofs and wood frames. They have a triple threat. First, wood rots from salty air. Second, flat roofs often leak at the parapet. Third, water from the roof runs down the wall directly onto the window. If you have such a case, window repair alone is not enough. Check the roof. A leaking membrane (TPO or EPDM) can create the illusion that the window is leaking. Open the corner of the wall above the window from outside. If the insulation is wet, the problem is on the roof. Call a roofer first, then a window repair person.
Case for Pasadena: old houses with tile roofs and wood casement windows.
In Pasadena, houses often have complex roof geometry: valleys, dormers, additions. Water may be coming not from the window but from a dormer higher up the wall. Or from a valley where leaves accumulate. Check the gutter above the window. A clogged gutter overflows water directly onto the wall. Clean the gutters of leaves, install gutter guards. Only then work on the window.
Case for Van Nuys and the Valley: sliding aluminum windows in single story homes.
Aluminum frames do not rot, but they conduct heat and cold very well, so condensation forms on them. In winter, you see puddles on the sill in the morning, but there is no leak. That is not a leak. That is condensation from temperature differences. The solution: improve room ventilation, install thermal break windows, or just wipe it up in the morning. But if puddles appear during rain, not after a cold night, it is still a leak. Look for cracks in the sealant.
Case for Santa Monica: windows in houses on pilings or with open ground floors.
In coastal homes, wind blows from below up under the overhang. Water can be driven under the sill from below, through the gap between the wall and the drip cap. Check the exterior drip cap (the sloped board below the window). It should slope away from the window and have bent edges. If not, install a new drip cap made of galvanized steel or PVC. This costs 50 to 100 dollars and solves the problem forever.
Case for North Hollywood: windows in homes with fiber cement or wood siding.
Siding is installed with overlaps. If the siding joint above the window is not sealed, water runs behind the siding and exits below at the window. Take a ladder, go up to the joint above the window. Apply silicone to the horizontal seam between panels. This often cures a chronic leak that has been unsuccessfully treated at the window for years.
Part Five. Tools and Materials Every California Home Should Have Before Rainy Season
Build yourself an emergency kit. Put everything in one box and keep it in the garage or closet. It costs less than one service call.
A roll of construction polyethylene 150 microns thick, 3 meters wide. Blue painter’s tape and aluminum foil tape for exterior use. A sharp utility knife with replacement blades. A putty knife, flat screwdriver, old toothbrush for cleaning weep holes. A can of compressed air. A tube of 100 percent silicone exterior sealant. A caulking gun. Hydraulic cement or emergency putty for wet surfaces. Thin wire 10 centimeters long. Two rolls of paper towels, they absorb better than regular rags. A 10 liter bucket. A dehumidifier if possible. A moisture meter, even the cheapest one.
With this kit, you will face any winter storm in Los Angeles without panicking.
Part Six. Legal Protection for Renters: You Should Not Pay for Someone Else’s Roof and Windows
If you are renting a home in any of these areas and the window leaks due to old sealant, rotten frame, or failed flashing, do not pay for the repair yourself. California Civil Code §1941.1 requires landlords to provide housing that is weatherproof. A leaking window is a violation.
Your actions: take photos and videos of the leak during rain. Record the date. Send the landlord a letter (email or text) with a description and attach the photos. Demand repair within a reasonable time, usually 30 days. If the landlord does not respond, call an inspector from your city or county health department. The inspection is free. If they confirm the violation, the landlord must fix it at their own expense and may be fined. You can also break your lease without penalty (Civil Code §1942.4) and even demand compensation for damaged belongings if water ruined them.
Never sign an agreement that you will fix the window yourself in exchange for a rent discount. The landlord will later claim you did a bad job and demand money. Let them hire a licensed contractor.
After the rain, the drywall under the window has become soft and you see black spots. That means mold is already inside the wall. Professional remediation with thermal cameras and removal of contaminated materials is needed.
One of the best local company in California — Ursa-Pro. Call them whatever u can, available 24/7

Оставить комментарий